
Your Cart is Empty

Show Car Finish Underneath: 3 Steps to Paint Like a Pro
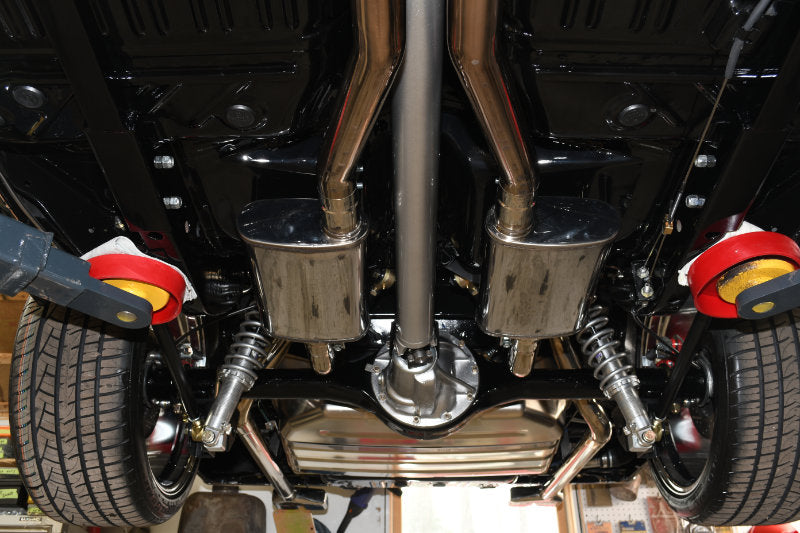
Most people never think about the underside of their build. They clean it up, maybe spray some undercoat, and call it good. But if you want true show car quality, the underside matters just as much as the top.
I’ve used this exact 3-step process on full restorations — including a ’67 Charger undercarriage detailed to the nines — and now on this cab floor. The results speak for themselves.
Step 1: Sealer
Sealer is the foundation. It locks everything down — bare metal, primer, filler work — and gives you a consistent surface for color. A good sealer keeps the paint from soaking unevenly and helps long-term durability.
Recommended tools/products:
Step 2: Basecoat
This is your color layer. Smooth, even passes are key. Don’t overload — build it up consistently for a uniform finish.
Recommended tools/products:
Step 3: Clear Coat
This is where the magic happens. Lay it down wet, even, and consistent. That’s how you get the glass-like finish that screams “show car.” On an underside, some might call it overkill — but if you’re chasing the best, it’s the only way.
Recommended tools/products:
Final Results
Show car results don’t come from cutting corners — even underneath. With Sealer, Basecoat, and Clear, you can give your project the same finish top to bottom.
👉 Want more paint & body tips? Subscribe to VtwinsToV8s.com for guides, tool reviews, and restoration coaching.
⚠️ Affiliate disclosure: Some links in this post are affiliate links. If you click and purchase, I may earn a commission at no extra cost to you.